One Page E-Shop

TL;DR One page e-commerce shop made with Aceternity UI, Next.js, Tally.so, Cloudflare Worker and Stripe.
A friend DM’ed me on Discord about a pet store asking him to prepay his dog's food order. They sent a photo of a IBAN via Messenger, which seems awful, so I decided to create a better solution - quick and dirty e-commerce shop.
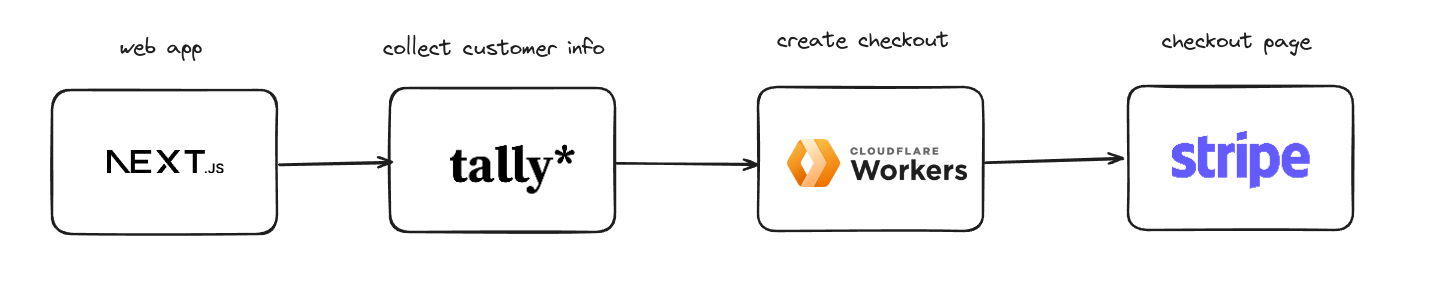
My idea is pretty simple. Next.js app that have two simple buttons, new purchase and old purchases. Then the flow for new purchase is gathering customer info, creating the checkout page with Cloudflare Worker and redirecting to the Stripe checkout page.
Creating Form
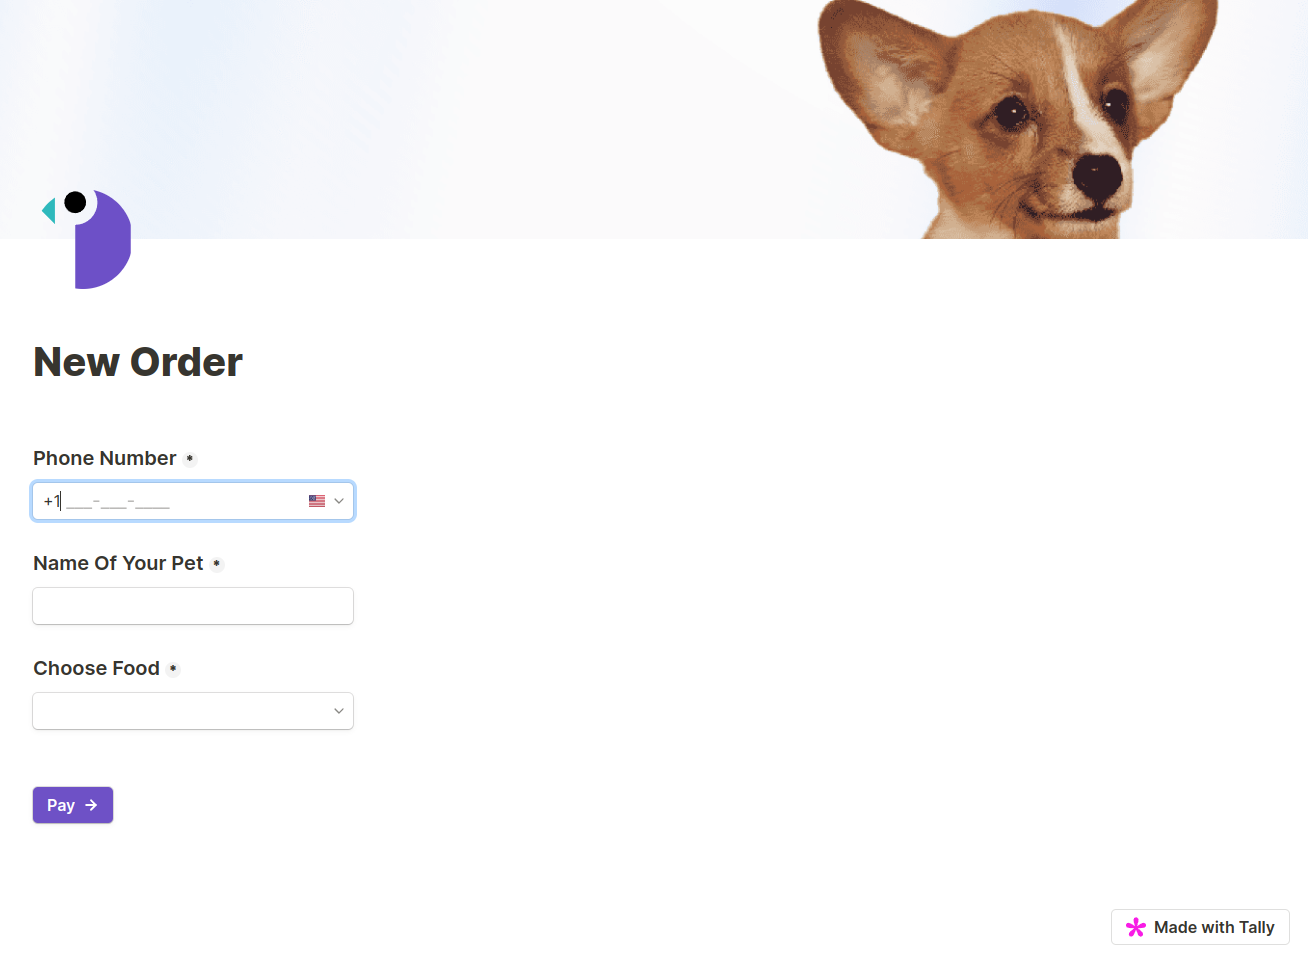
I chose Tally for the form, as it's a free and easy to use. Of course I can create the form directly within the next app but I like to cut corners when I am not exactly sure what I am doing.
I needed to collect the customer's phone number, pet's name, and chosen food package. In the end the form ended looking like this:
Using Cloudflare Worker
Next, I had to link the food package selection to a dynamic Stripe checkout. I used a Cloudflare Worker to redirect from Tally, mapping the information and creating the necessary Stripe checkout page. I added the Cloudflare worker as a redirect URL in Tally with each form input as a URL parameter.

The Cloudflare worker parses the URL encoded by Tally, extracting the phone number, pet name, and food choice:
addEventListener('fetch', event => {
    event.respondWith(handleRequest(event.request))
})

async function handleRequest(request) {
    const url = new URL(request.url);
    const params = decodeURIComponent(url.pathname).split('/').pop().split('&');
    const [phoneNumber, petName, foodChoice] = params.map(decodeURIComponent);
}
Handling the food choice was tricky because the response also includes the amount to be paid. I used regex to extract it and convert it to cents for Stripe:
const priceMatch = foodChoice.match(/\/\s*(\d+)\s*\$$/);

if (!priceMatch) {
  return new Response('Invalid food choice format', { status: 400 });
}

const price = parseInt(priceMatch[1], 10);
const priceInCents = price * 100;

// Create the product description
const productDescription = `${foodChoice} / ${phoneNumber} / ${petName}`
Creating the Stripe session was done manually since I couldn't find a way to use npm package in Cloudflare Worker. The flow is now ready: filling out the form dynamically creates a new checkout page with all the information. I might improve this with custom Stripe fields in the next iteration:
Gluing Everything Together
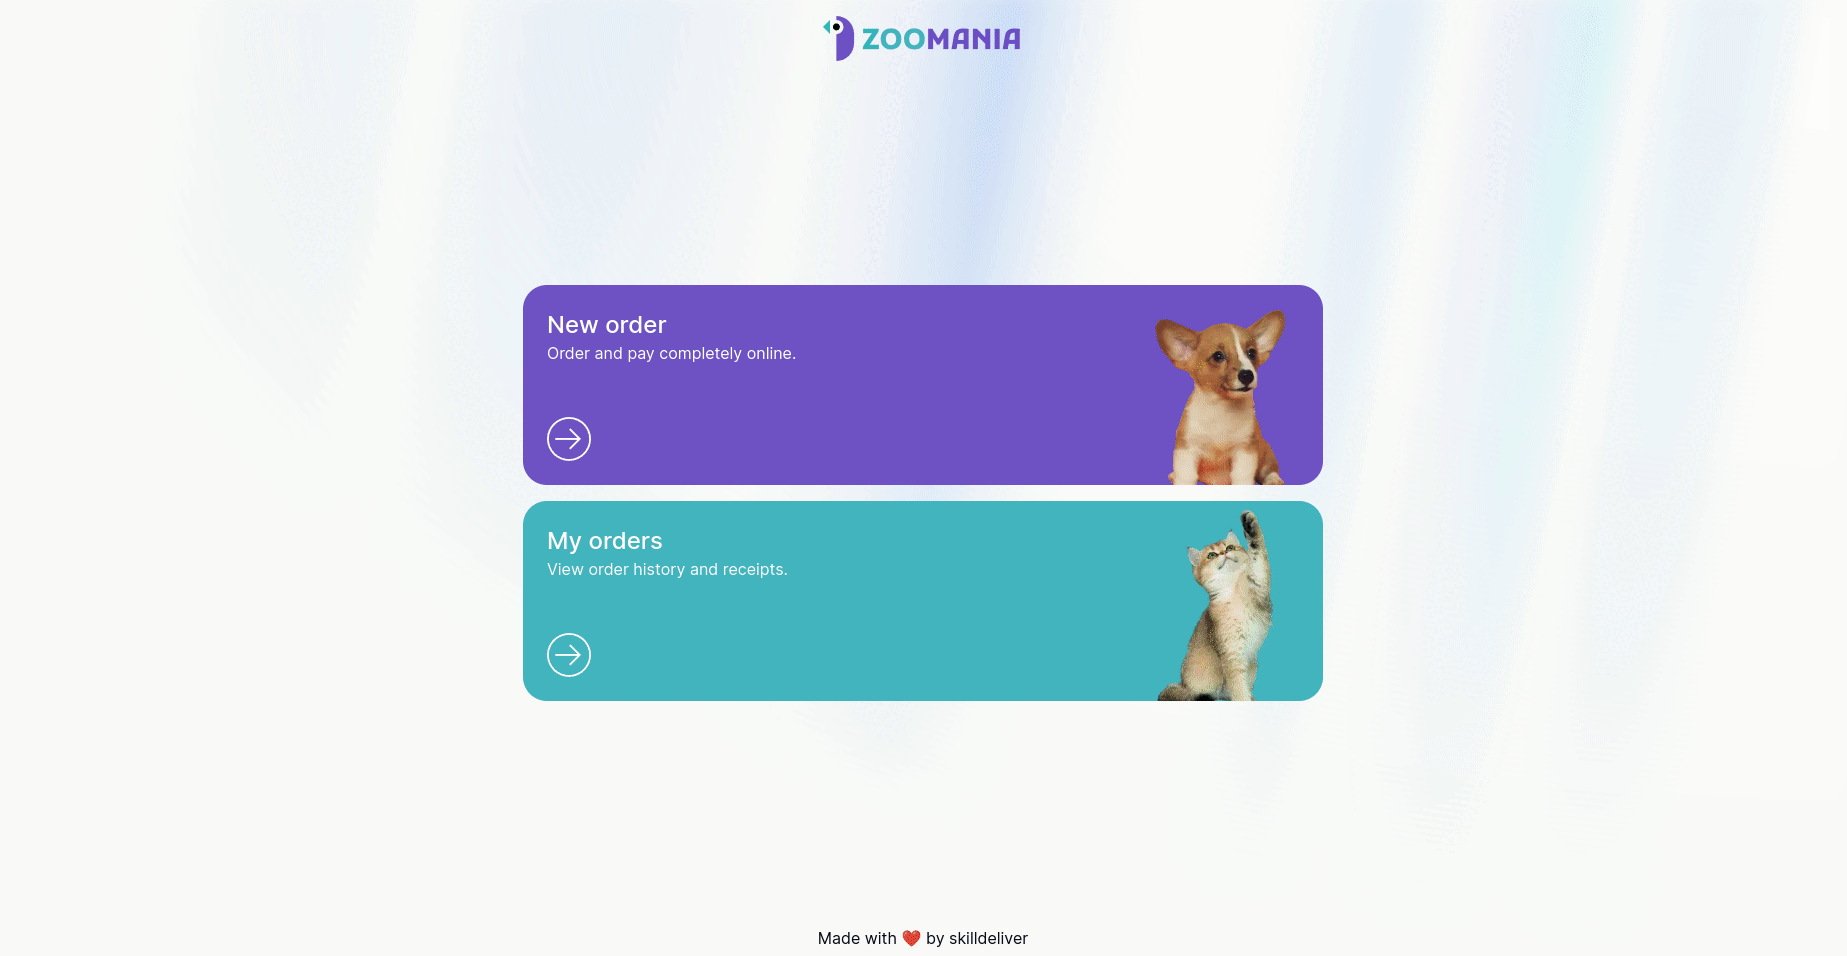
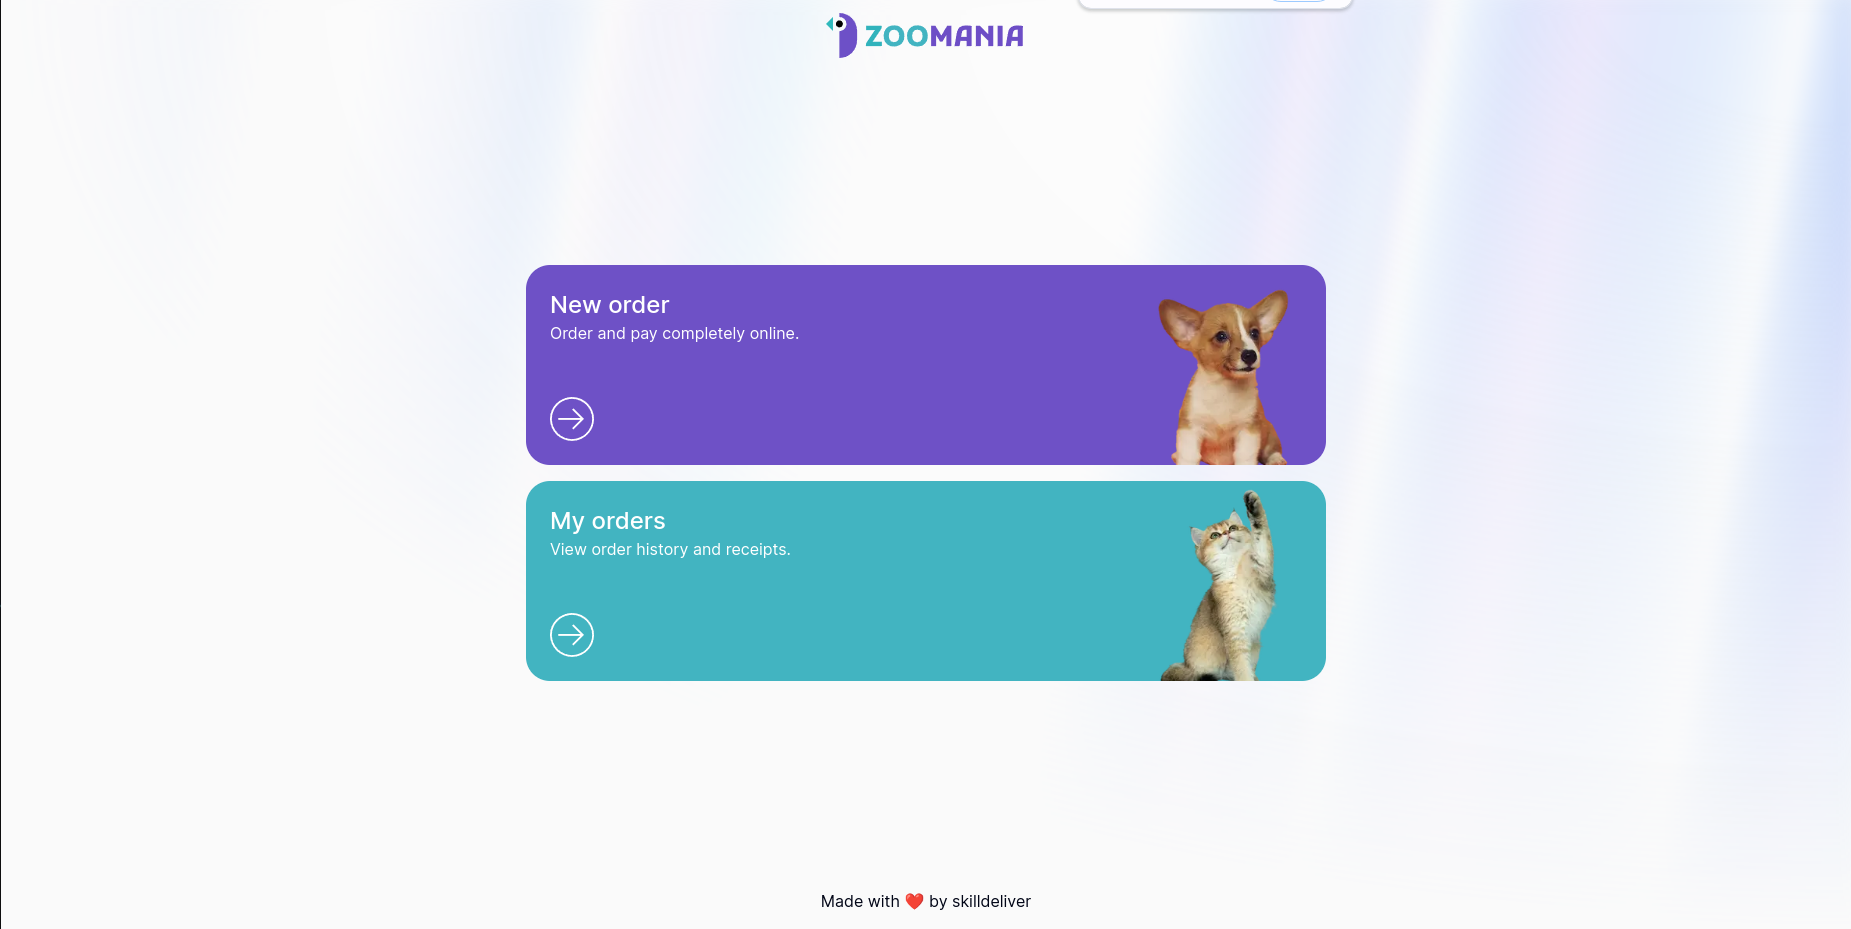
To complete the process, I created a Next.js website with a homepage featuring two buttons: "New Order" leading to the Tally form and "My Orders" to the Stripe customer portal. I used Accernity UI for the background with Aurora Background.
I sketched my idea in Figma, using images of cute dogs and cats from Unsplash:
I then coded my components on the Aurora background, adding custom states and hover effects:
And here is the code for the component of the button / banner / link / whatever.
<Link div className="w-full relative overflow-hidden flex justify-between max-w-[800px] h-[200px]" href="/order">
    <div className="w-full relative overflow-hidden flex justify-between max-w-[800px] h-[200px] cursor-pointer rounded-3xl p-6 bg-[#6E51C6] text-white"
    onMouseEnter={handleMouseEnter}
    onMouseLeave={handleMouseLeave}
>
    <div className="flex flex-col justify-between">
      <div>
        <h1 className="text-2xl font-medium">New order</h1>
        <p>Order and pay completely online.</p>
      </div>
      {isHovered1 ? <ArrowSvg hovered={true} textColor={`#6E51C6`}/> :  <ArrowSvg hovered={false}/>   }
    </div>
    <Image className="absolute right-0 top-[-60px]" src="/doggo.png" alt="Dog" width={200} height={300} />
    </div>
</Link>
After using the components, the home screen ended looking like this:

This is it. I might work on new iterations in the future.